Flutter Snackbar
Snackbar in Flutter is a widget showing the lightweight message that briefly informs the user when certain actions occur. It displays the message for a very short period, and when the specified time completed, it will be disappeared from the screen. By default, snack bar displays at the bottom of the screen. It is an excellent way to give feedback to users. It also contains some actions that allow the user to undo or redo any action. Usually, the snack bar is used with the scaffold widget.
SnackBar Properties
The following are the important properties of the snack bar used in the Flutter:
| Attribute Names | Descriptions |
|---|---|
| content | It is the main content of the snack bar, which is actually a text widget. |
| duration | It is used to specify how much time the snack bar should be displayed. |
| action | It is used to take action when the user taps on the snack bar. It cannot be dismissed or cancel. We can only undo or redo in the snack bar. |
| elevation | It is z-coordinate where the snack bar is placed. It is used to control the shadow size below the snack bar. |
| shape | It is used to customize the shape of a snack bar. |
| behavior | It is used to set the location of the snack bar. |
| bagroundcolor | It specifies the background of the snack bar. |
| animation | It defines the exit and entrance of the snack bar. |
If we have used the snack bar in the mobile app, it allows the users to get information about their actions in the app. In this article, we are going to learn how to add and show SnackBar in Flutter using the following steps:
- Create a project in the IDE you are using.
- Create a Scaffold Widget.
- Display a SnackBar Widget.
- Provide an optional action.
Step 1: Create a Flutter project in the IDE you are using and then open the project in Android Studio. After opening the project, we need to navigate to the lib folder and open the main.dart file.
Step 2: Create a Scaffold widget responsible for the visual structure and ensure the essential widgets do not overlap.
Step 3: Next, we need to display a SnackBar. So, create a snack bar in the Scaffold widget as given below:
Step 4: Next, we can add some action to the snack bar. For example, suppose the user accidentally deletes a message or sent a mail, then we can provide an optional action in the snack bar to recover those messages. The below demo code explains it more clearly:
Let us see the complete code of the above steps. Open the main.dart file and replace the following code. This code contains a button, and when the user taps on this, it will display the snack bar message. It also contains actions to undo or redo the changes.
Output:
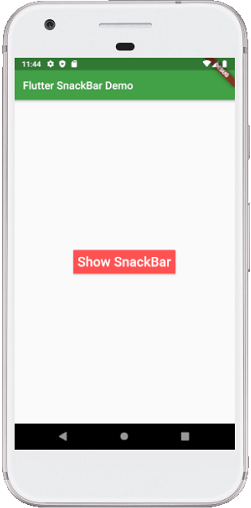
When we run this app, it will show the UI of the screen as below screenshot.

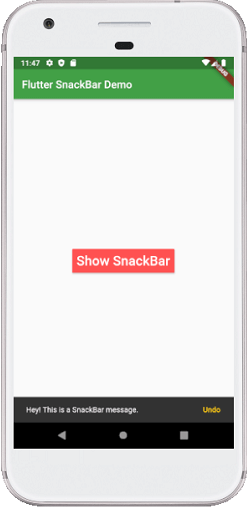
If we click the "Show SnackBar" button, we will see the message at the bottom of the screen. This message will be deleted automatically after completing the specified time. See the below screenshot:


